How to Assemble a Mini Go Kart
Tips and Tricks mini karts
- shock is tucked behind the pedals
- remote is ziptied under dash
- axle hardware is zip tied to a front spindle (usually left)
- do not tighten frame bolts
until the entire frame is together
- remember! tires are directional
- reverse models come with gear oil, no need to top off
Remove the cardboard and metal cage from your go kart.
If any of these items are missing, please e-mail us immediately for a replacement:
Unpack all of the parts and pieces. Use checklist below.
2 main roll cage bars
2 side roll cage bars
1 I shaped top bar
1 fuel tank with support bars
2 short fuel tank support braces
1 short support bar
2 narrow front tires
2 wide rear tires
**one shock is partially installed**
**shock bolts and nuts are attached to kart**
**remoteand key fobs are under dash**

1 battery
1 steering wheel
2 foam pads
1 battery strap
1 battery cover
1 battery cushion
4 hub caps
2 keys
2 remote kill fobs
1 flag
2 small castle nuts
1 steering cover
1 title (certificate of origin)
1 owners manual
2 large castle nuts
2 small flat washers
2 large flat washers
4 cotter pins
4 valve stem caps
2 bar spacers
16 bar bolts
22 cupped washers
14 bar bolt nuts
3 steering wheel bolts
3 steering wheel nuts
4 fuel tank bolts
4 fuel tank nuts
1 bag spare parts
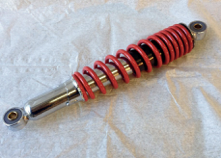
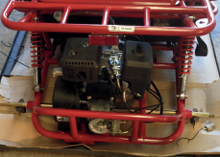
Remove the metal brace from the rear shock mounts and discard. The shock bolts and nuts are installed on the shocks mounts. Remove and set aside. Lift up on the rear rack and install the second bolt on the shock that is already attached.
Install the second shock and tighten all 4 shock bolts. The top of the shock is the end where the spring is coiled the tightest.
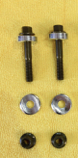
Prepare two of the bar bolts, cupped washers, and 2 bar bolt nuts.
Install the fuel tank rear rack by sliding the rack bars over the bar hubs just behind the seat.
Make sure the curve of the cupped washers sit flush against the rounded edge of the roll cage bar.
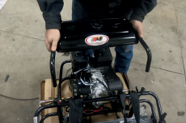
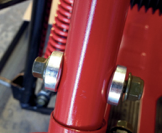
**do NOT tighten any of the bar bolts until the entire roll cage is assembled
**You may need to use a rubber mallet to tap the bolts through the bars.
With the short 8mm bolts and nuts, install the fuel tank supports. The short metal brace will attach to the bottom side of the tank on one end, and just behind the seats on the other end.
**do not tightern bar bolts until instructed to do so
**main roll cage bars are not directional
**side bars are directional and will only line up if installed correctly
**make sure each cupped washer is properly aligned with the roll cage bar so that the rounded edge of the bar is flush with the cupped side of the washer
**bars with black plastic cap will only use one washer, and no nut. Tighten these carefully to avoid stripping out the inside of the bar.
Prepare bar bolts, cupped washers, and nuts.
Install main roll cage bars, side cage bars, top cage, and rear support.
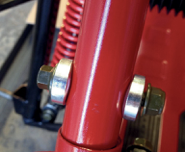
** Some bars may have paint or metal shavings inside that make it too snug to fit easily. You can gently tap with a rubber mallet to force it on.
**to align bolt holes, insert a screwdriver and pry the bar into the correct position.
**When the entire roll cage is assembled, tighten all bar bolts (if you do this too soon, you cannot install all of the pieces correctly.)
**The next few steps require that the kart be lifted off the ground. you can use a jackstand to carefully prop the back end of the kart up. Once the rear tires are installed, you can use the jack stand to prop up the front end.
** if you have a forklift or a small tractor with forks, your can lift the kart by the top bars of the roll cage
**sometimes the mini karts come with the spindles, A-arms, and front shocks already assembled. You can skip this process if it's already done. If your spindles are not installed, follow these steps before moving on.
**There will be additional hardware in your kit if the spindles are not installed yet.
Locate the dust boot cover on the axle of the spindle. The dust boot is placed here for safe keeping in transit and needs to be moved to the correct position. Install the dust boot over the bottom threads of the spindle to protect the greased joint inside.
**You may need to push or pull on the spindle or turn the steering in order to align the spindle correctly with the lower A-arm.
Place the lower threads of the spindle into the bolt hole of the A-Arm, making sure to align the square shoulder of the spindle inside the square hole. Place a flat washer and castle nut over the threads. When you tighten this castle nut, be sure to align the hole on the spindle with a set of grooves on the castle nut. A cotter pin will slide through the grooves and the axle.
Insert the cotter pin with the longer side facing out. Fold the longer side over the tip of the spindle. Cut the shorter side off close the castle nut. Repeat this process on the other spindle and A-arm.
**Tires are directional. The tread will wear immediately if installed on the wrong side.
**Rear wheels have a hole with a square keyway that fits over the key on the rear axle.
**Front wheels have a hole with a bearing to slide over spindle axle.
**With the valve stem facing away from the kart, the tip of the V-shaped tread should point forward.
Passenger side tire with tread pointing forward and valve stem facing out
Place front tire onto the spindle axle. Place a flat washer and castle nut over the axle threads. When you tighten this castle nut, be sure to align the hole on the axle with a set of grooves on the castle nut. A cotter pin will slide through the grooves and the axle.
Insert the cotter pin with the longer side facing out. Fold the longer side over the tip of the axle. Cut the shorter side off close the castle nut. Install hub cap.
Repeat on the other front tire.
**In our assembly video, we install rear tires next, but it is easier to install the battery without the rear tire on the kart
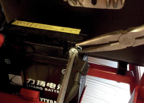
**The battery strap is meant to be very tight. You may need a pair of vice grips to pull on it hard enough. Another option is to put a screwdriver through the metal ring, and use the screwdriver to pry up against the bracket to get enough leverage.
**We do not install the gray battery cover, leaving it off makes it a bit easier to install the strap.
**It is much easier to install the battery if you sit inside the kart in the passenger seat. This is why we leave the seat backs off up to this point.
Set the battery cushion into the battery tray. Place the battery on top of the cushion. Install the battery cables with the bolts included in the box.
Place the gray plastic cover over the battery and arrange the cables neatly in the grooves. **You may skip this step if desired. We do not do this step in our shop.
Hook one end of battery strap on the bracket, pull the strap over the top of the battery. Stretch the strap to hook the other end on the second bracket.
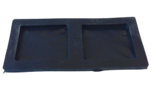
Place rear tire onto rear axle. Place a flat washer and castle nut over the axle threads. When you tighten this castle nut, be sure to align the hole on the axle with a set of grooves on the castle nut. A cotter pin will slide through the grooves and the axle.
Locate the fuel line that has a fuel filter attached and a spring inserted over the middle of the line. This line will connect to the fuel petcock on the bottom driver's side of the tank. Slide a fuel line clamp over the outside of the line, making sure it secures the line to the fuel valve.
Insert the cotter pin with the longer side facing out. Fold the longer side over the tip of the axle. Cut the shorter side off close the castle nut. Install hub cap.
Repeat on the other rear tire.
The other fuel line that runs back into the air filter assembly will attach to the tank vent. Locate the vent on the top of the tank, insert the fuel line, and slide the clamp until it sits over the line and the vent.
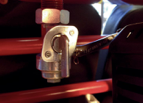
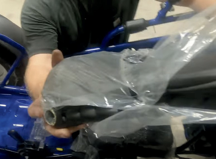
Remove plastic from seat backs. Locate the open tubes that are made into the seat back, on the bottom edge. Slide the tubes in the seat back over the two smaller tubes that stick up behind the seat bottom. Repeat on the other side.
**Go ahead and fasten all of the seatbelts. If left unbuckled, they can drag the ground and break.
**Don't overtighten your steering wheel bolts
Locate your steering wheel nuts and bolts
Install The steering wheel onto the steering shaft with the 3 nuts and bolts.
The flat edge of the steering wheel is the bottom. Make sure front tires are pointed forward.
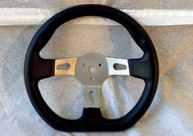
Clip the bottom tabs of the steering wheel cover under the bottom edge, with arrow pointing up. Push upward on the center of the cap until the top tab clicks into place.
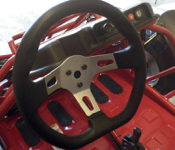
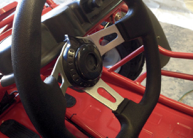

You've built a go
kart!
**Check out our youtube channel for videos on adjusting the steering, doing an alignment, tips for your first ride, and more!
Before you crank your kart, check the oil and top off as needed. The dip stick is on the the drivers side, just behind the driver seat, located below the starter.
For models with REVERSE:
**The black cap on the back side of the engine is
NOT the engine oil, it is the gearbox oil. This gearbox takes a a very small amount of gear oil. It will appear to be empty, but it only requires just enough gear oil to coat the parts. Do NOT fill this, it will blow out your gaskets and cause leaks.