TrailMaster Go-Kart First Start & Pre-Ride Checklist
Everything to Check Before Driving Your New TrailMaster
There's nothing quite like the excitement of finishing your new TrailMaster go-kart. The last bolt is tightened, the battery is connected, and everyone is ready to go for that first ride.
But before you turn the key, take a few minutes to perform a complete inspection.
At GoKartMasters, we've been selling TrailMaster go-karts and mini bikes for over 20 years and have helped customers assemble more than 5,000 machines. During that time, we've learned that many of the most common problems can be prevented with a simple pre-ride inspection.
This guide combines the factory recommendations with the additional checks and maintenance tips we use every day in our own shop.
Why the First Ride Matters
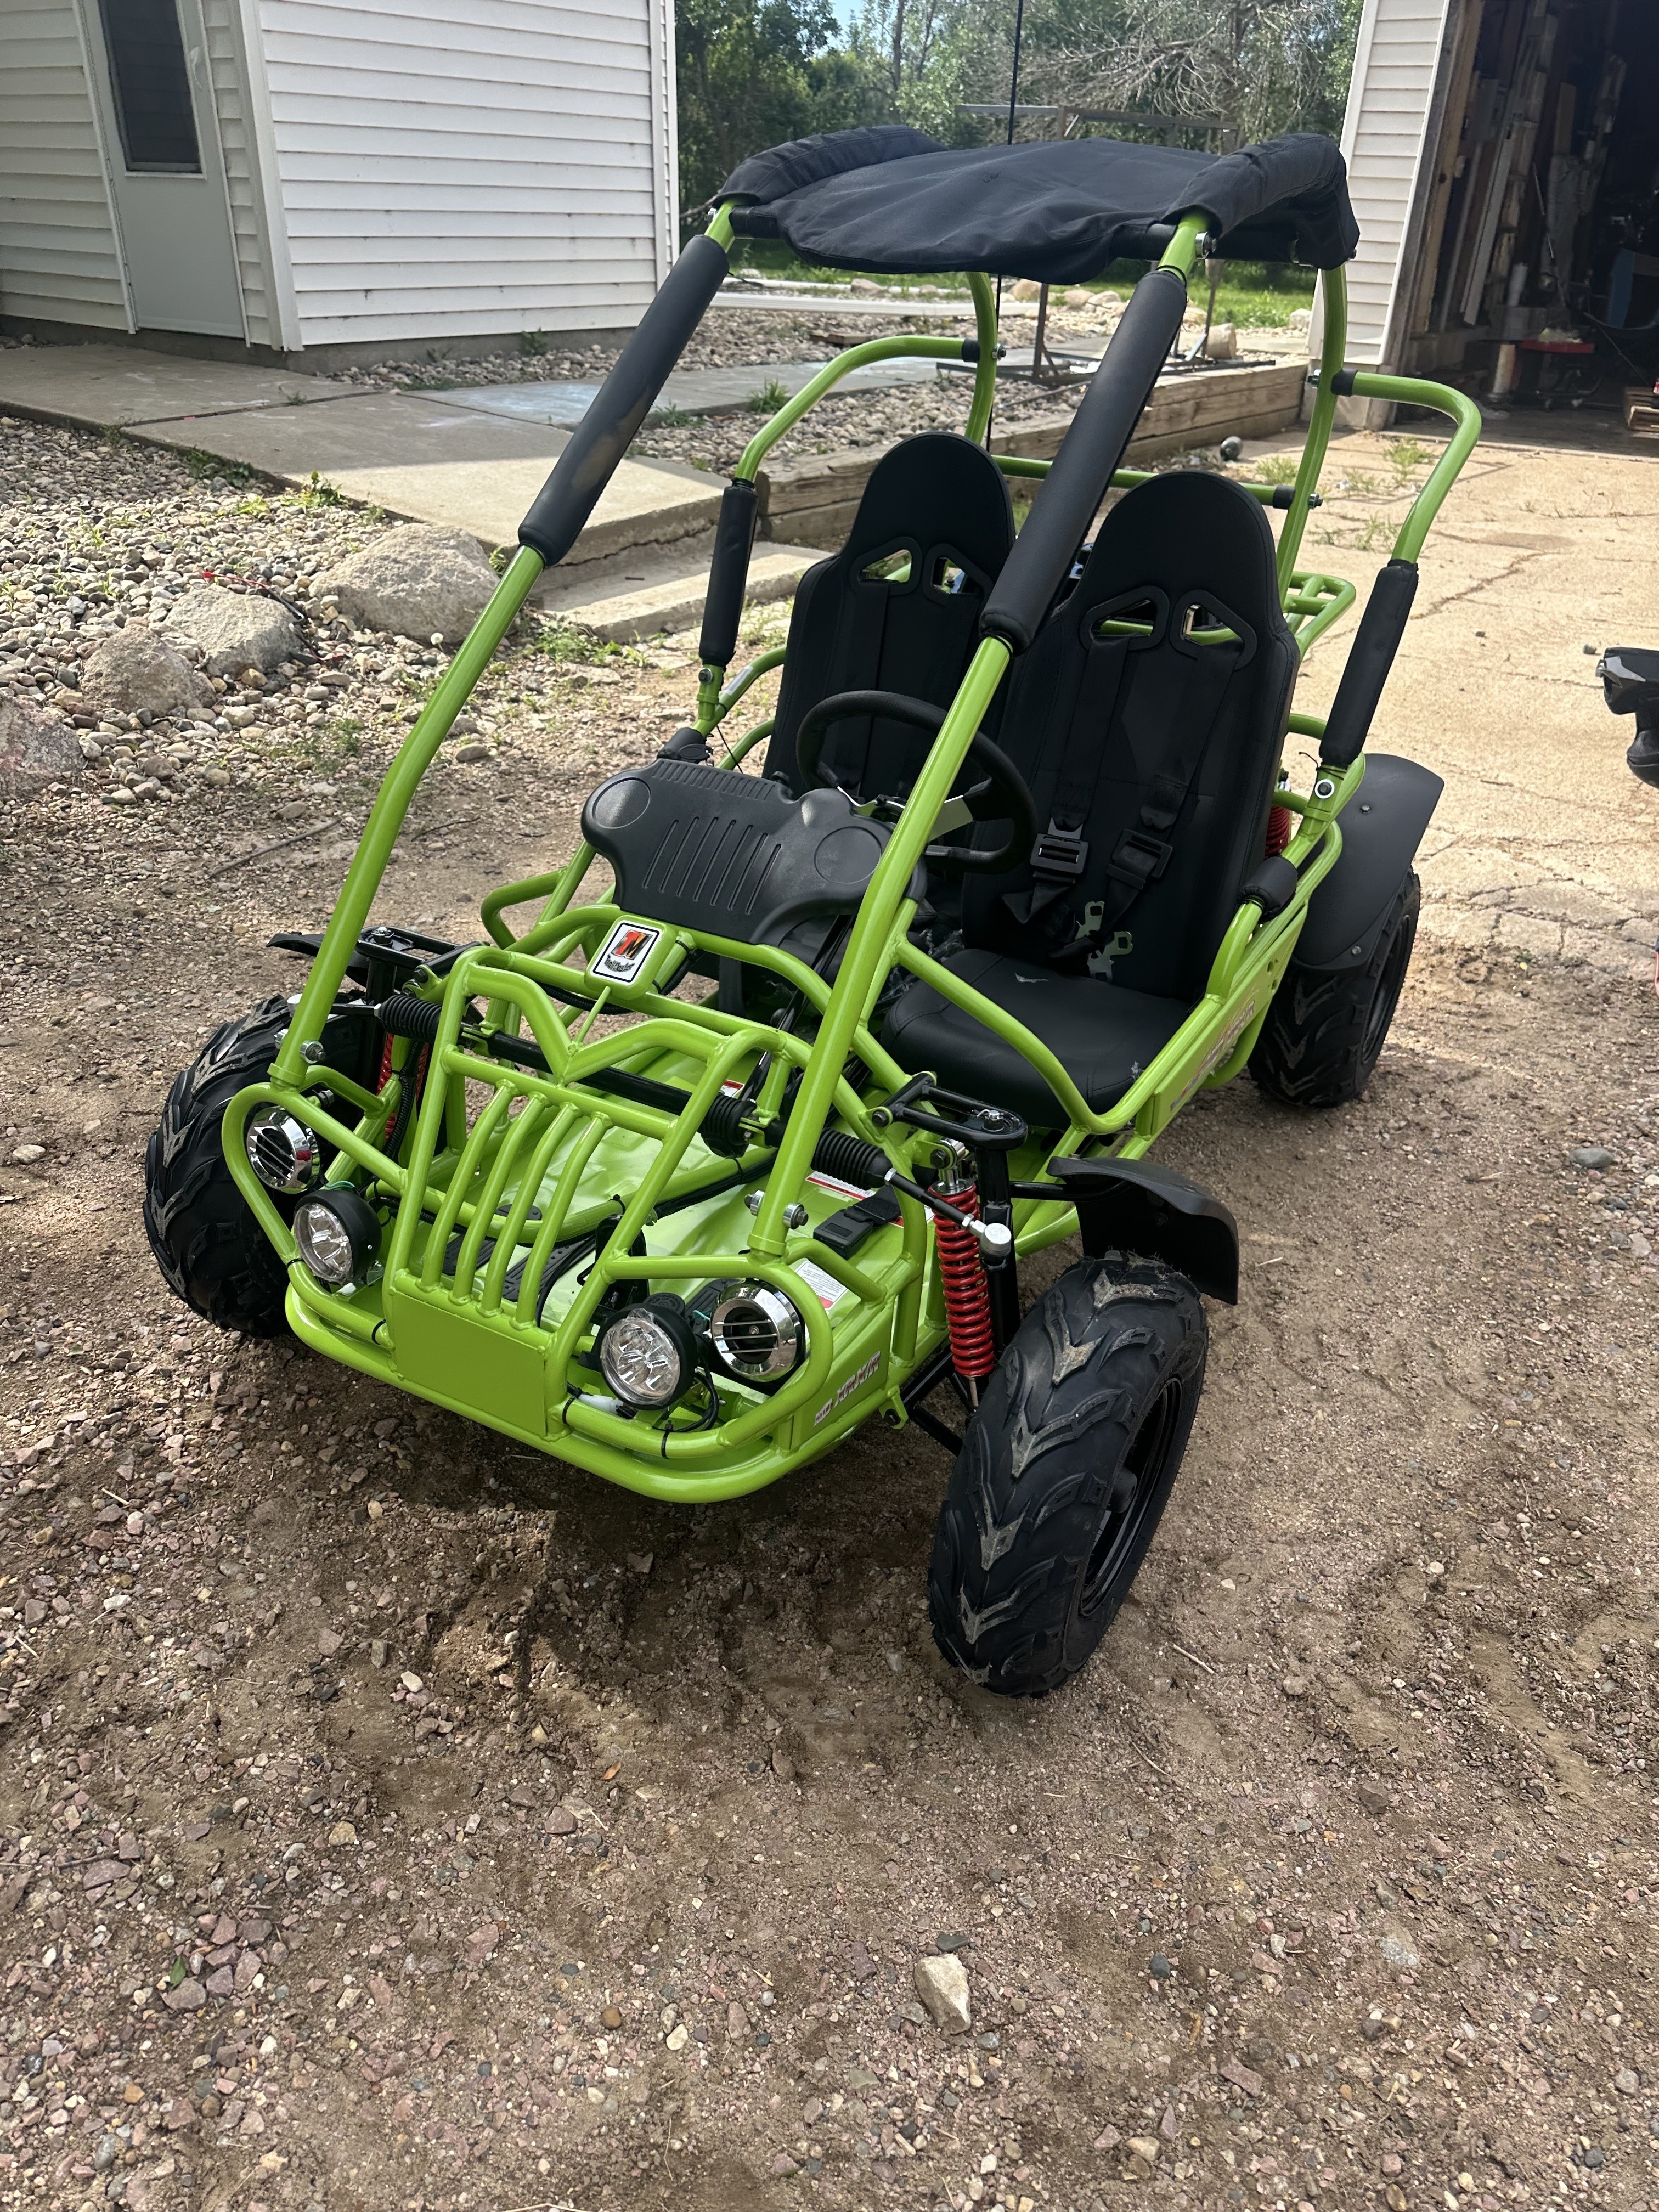
Your go-kart has traveled a long way before arriving at your home.
It has been:
- Assembled at the factory
- Partially disassembled for shipping
- Transported hundreds or even thousands of miles
- Reassembled by you
Even if everything was assembled correctly, it's worth spending a few minutes making sure everything is ready before putting the kart into service.
Think of this as your final quality inspection.
Step 1: Release the Parking Brake
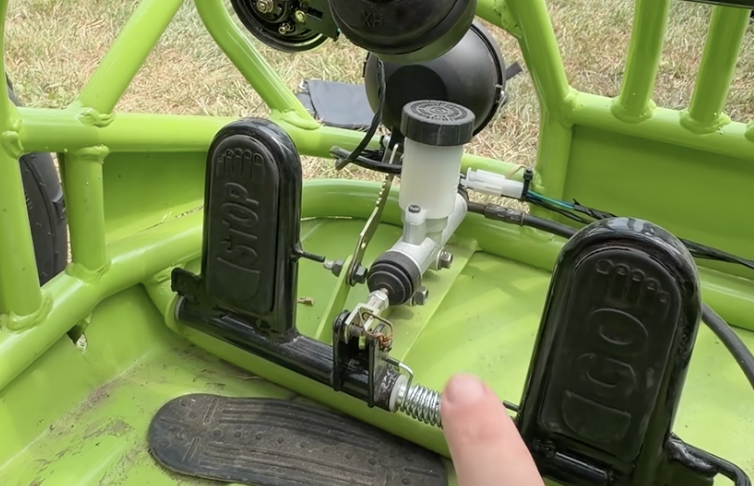
Believe it or not, one of the most common support calls we receive starts with:
"My kart won't move."
A lot of customers panic becuase they think they've bought a lemon. But there is no need to panic. Many times, the parking brake is still engaged. The parking brake is just a bronze colored lever located behind the brake pedal.
Before attempting to drive:
- Make sure the parking brake lever is completely released.
- Verify the rear wheels rotate freely.
It's a simple check that can save a lot of confusion.
Step 2: Check the Engine Oil
If there is one thing you should never skip, it's checking the engine oil.
Never assume the oil level is correct simply because the engine is new. The karts come from the factory with a cheap break in oil, but often the levelis too low and needs to be topped off.
Before every ride:
- Remove the dipstick. On mini and mid size models, it's on the front of the enigne, just behind the driver seat. You can remove the seat to easily access it. On full size models, it is located ont eh passenger side of the engine below the air filter box.
- Wipe the dipstick clean.
- Reinsert it and set it on the threads, but do not screw it back in.
- Verify the oil level.
- Add oil if necessary.
We recommend usin a synthetic 10W-30 engine oil.
The oil should be checked before every ride and changed every 10 hours of operation, or sooner if it becomes gray or black.
GoKartMasters Tip
Checking the oil only takes about a minute.
Replacing an engine takes much longer.
Step 3: Fill the Fuel Tank
Fresh fuel makes a huge difference in performance.
At GoKartMasters we recommend:
- Premium gasoline (91-93 octane), or
- Non-ethanol fuel whenever available.
Avoid using gasoline that is more than one month old. Never dump the last bit of fuel out of a gas can into your tank. That is where all of the water, dirt, and debris collect.
We also recommend using a quality fuel stabilizer such as:
*these links are our affiliate links for these items.
Top off the tank as needed, but avoid overfilling it.
GoKartMasters Tip
Old gasoline is responsible for many carburetor problems. If your kart sits for long periods, using stabilized fuel can save you from future headaches.
Step 4: Inspect the Battery
Make sure:
- Red cable is connected to the positive terminal.
- Black cable is connected to the negative terminal.
- Battery terminals are tight.
- Battery strap is secure.
If you installed a battery maintainer pigtail during assembly, now is a good time to verify that it's routed safely and won't rub against moving parts.
Don't Assume the Battery Is Good
A battery charger may indicate 12 volts, but that doesn't necessarily mean the battery is healthy.
The real test happens when the starter engages.
A weak battery may show full voltage while sitting still, but the voltage drops dramatically under load and the engine won't crank.
If your kart won't start, don't immediately assume the battery is defective.
Check the Main Fuse
If your battery appears to be good but nothing happens when you turn the key:
Check the main fuse.
We've seen many situations where the battery cable accidentally touched the frame during installation.
The resulting short circuit instantly blows the fuse.
Fortunately, replacing the fuse is much easier than replacing the battery.
Safety Reminder
When installing or servicing the battery:
- Never allow tools to touch both battery terminals.
- Avoid shorting the battery against the frame.
- Work carefully around electrical connections.
Step 5: Inspect the Air Filter
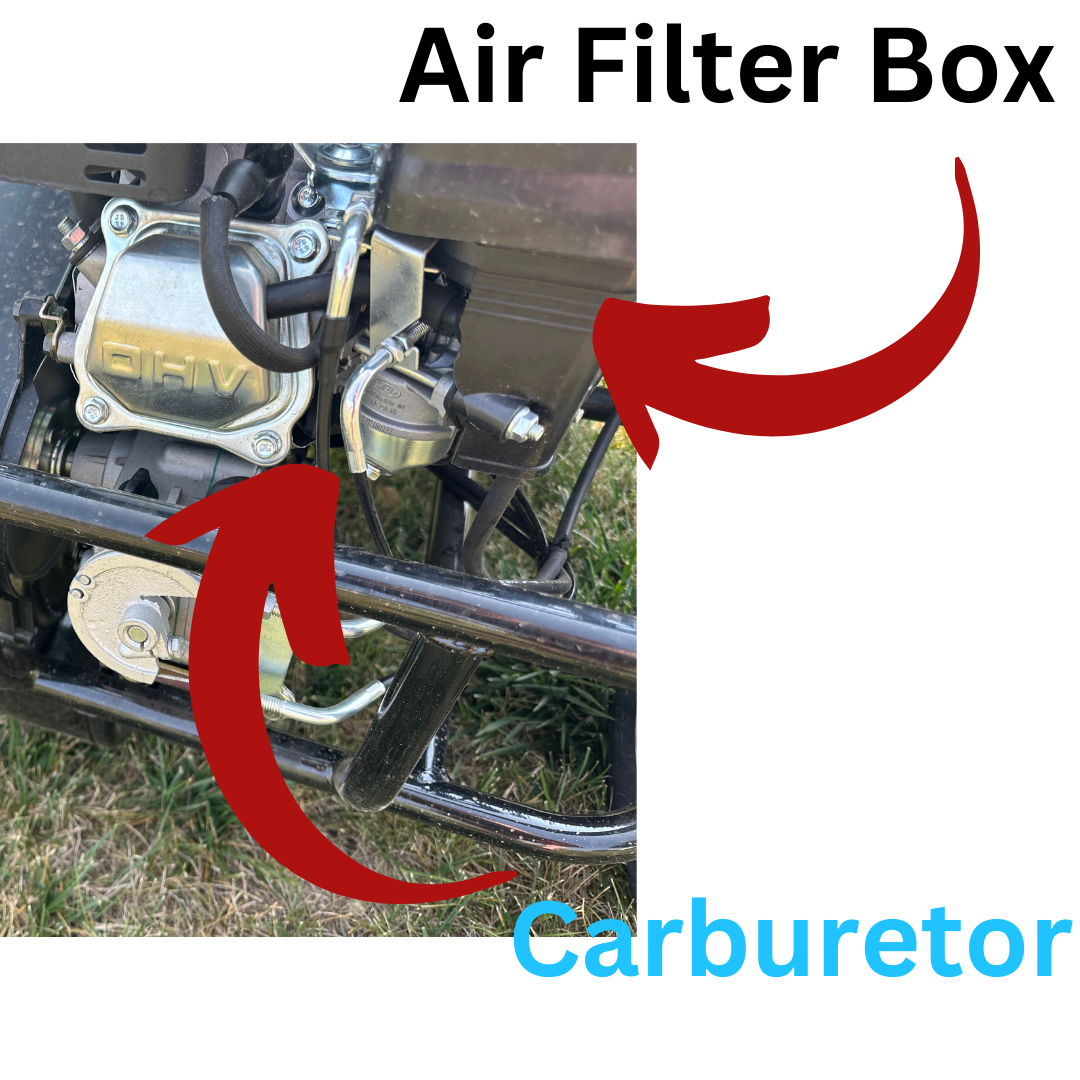
Your engine needs clean air just as much as it needs clean fuel.
Before riding:
- Inspect the air filter.
- Make sure the intake boot is fully seated.
- Check that all boot clamps are tight.
Replace the air filter yearly or more often if you ride in dusty conditions.
Step 6: Test the Brakes
Before moving the kart:
Press the brake pedal several times.
Look for:
- Smooth pedal movement
- Proper brake feel
- Free play
- Brake fluid leaks
If necessary, adjust the brake rod before riding. Push the kart a bit to ake sure the brakes hold.
Step 7: Check Tire Pressure
Correct tire pressure improves:
- Steering
- Ride quality
- Tire life
- Traction
We recommend approximately 8 PSI for most riding conditions.
Never exceed 10 PSI. Different terrain may require small adjustments.
Step 8: Inspect and Lubricate the Chain
This is one area where GoKartMasters does things a little differently.
We never assume the chain is ready simply because the kart is new.
Before riding:
- Lubricate the chain.
- Remove excess slack.
- Do not overtighten the chain.
A chain that's too tight wears out faster than one that's slightly loose.
Recheck chain adjustment every 2 hours of riding, especially during the break-in period.
Step 9: Test the Engine Stop Switch
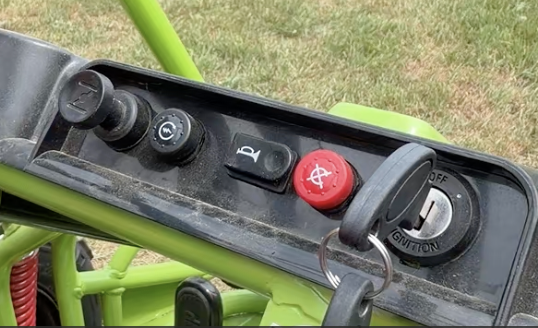
Before every ride, verify that you can stop the engine quickly if necessary.
Start the engine.
Allow it to idle for about 30 seconds.
Press the stop button.
The engine should shut off immediately.
If it doesn't, don't ride until the issue has been corrected.
Step 10: Test the Throttle
Put the kart in neutral, or hold the brakes. With the engine running:
Press the accelerator pedal.
Make sure:
- The pedal moves freely.
- The engine responds smoothly.
- The throttle returns completely to idle when released.
A sticking throttle should always be repaired before riding.
Step 11: Tighten All Hardware
Walk around the kart and inspect all major fasteners.
Pay particular attention to:
- Steering hardware
- Suspension bolts
- Brake system bolts
- Throttle linkage
- Roll cage hardware
- Wheel lug nuts
Even new hardware can settle after shipping and assembly.
Step 12: Check the Seat Belts
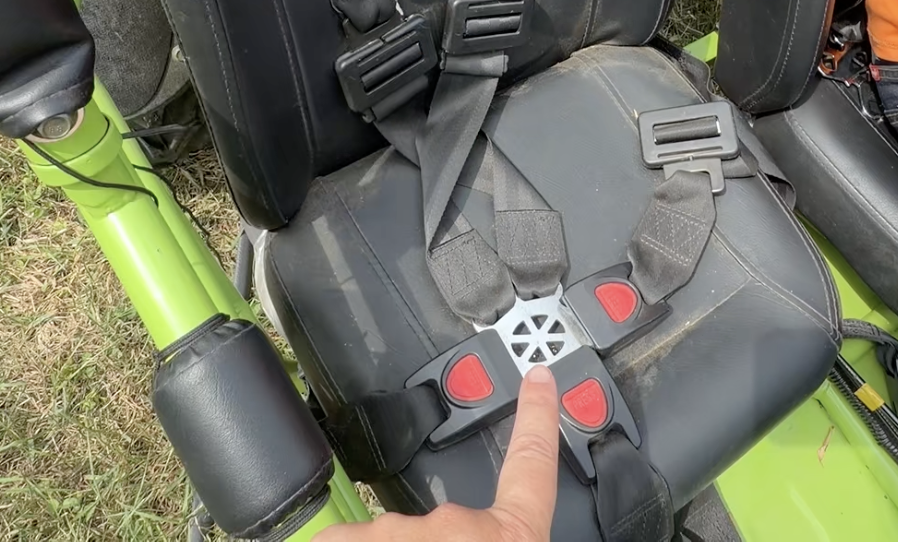
Seat belts are one of the simplest safety systems on your kart.
Before riding:
- Pull firmly on each belt.
- Verify every latch locks securely.
- Adjust the belts until they're snug against the rider.
GoKartMasters Tip
If a seat isn't being used, buckle the belt anyway.
Loose seat belts can get caught in the rear tire and become damaged. We've seen it happen, and it's an easy problem to prevent.
Step 13: Check the Steering
Turn the steering wheel fully left and fully right.
Verify:
- Smooth movement
- No binding
- Proper steering alignment
If something feels unusual, investigate before driving.
Teach Every New Driver These Safety Rules
Before your first ride, take a few minutes to review these rules with every driver—especially children.
- Always wear a properly fitted helmet.
- Always wear closed toe shoes.
- Alwasy take a slow cautionary lap to check the trail.
- Watch for other riders.
- Keep your hands, arms, feet, and legs inside the vehicle while it's moving.
- Always wear your seat belt.
- Never carry extra passengers unless your model is designed for them.
- Ride only in areas that are appropriate for off-road vehicles.
- Never operate the kart under the influence of drugs or alcohol.
Building good habits on the first ride makes every future ride safer.
The GoKartMasters "Keys to Success"
These are the habits we encourage every TrailMaster owner to follow:
- ✔ Check the engine oil before every ride.
- ✔ Use 10W-30 engine oil and change it every 10 hours or when it becomes gray or black.
- ✔ Use fresh premium or non-ethanol gasoline with a quality fuel stabilizer.
- ✔ Keep the battery on a maintainer whenever the kart isn't being ridden.
- ✔ Inspect the air filter regularly and replace it yearly or sooner in dusty conditions.
- ✔ Test the brakes before every ride.
- ✔ Maintain approximately 8 PSI tire pressure (never exceed 10 PSI).
- ✔ Lubricate and adjust the chain frequently, especially during the first few hours of ownership.
- ✔ Test the engine stop switch before every ride.
- ✔ Make sure the throttle returns smoothly to idle.
- ✔ Check steering, seat belts, lug nuts, suspension bolts, and roll cage hardware before heading out.
Final Thoughts
Owning a TrailMaster is about making memories with your family, not spending weekends fixing preventable problems.
A few minutes spent inspecting your kart before the first ride—and before each ride afterward—can dramatically improve reliability, safety, and the overall ownership experience.
At GoKartMasters, we've helped thousands of families get back to fun. We hope these recommendations help you enjoy your new TrailMaster for years to come.